The “Authenticate Manually” option in Copilot Studio is used to configure custom authentication methods when the default authentication flow is not applicable or desired. It allows developers to create custom authentication flows by managing tokens, credentials, or API keys manually, which are then passed to the Copilot for accessing various services or APIs.
Some services require specific ways to handle authentication that may not align with Azure AD’s out-of-the-box support. Manually handling authentication allows you to work around these limitations.
- Sign in to the Azure portal, using an admin account in the same tenant as your copilot.
- Go to App registrations.

- Select New registration and enter a name for the registration. Don’t alter existing app registrations.
- Under Supported account types, select Accounts in any organizational tenant (Any Microsoft Entra ID directory – Multitenant) and personal Microsoft accounts (e.g. Skype, Xbox).
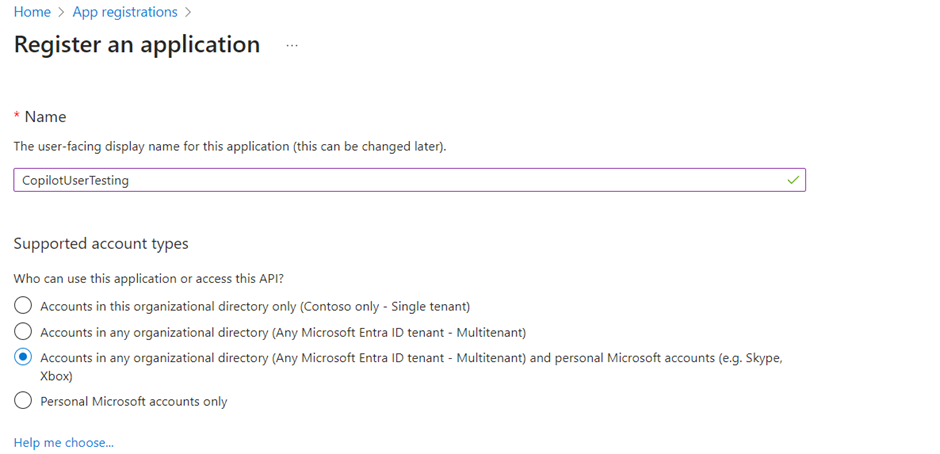
- Leave the Redirect URI section blank for now. Enter that information in the next steps.
- Select Register.
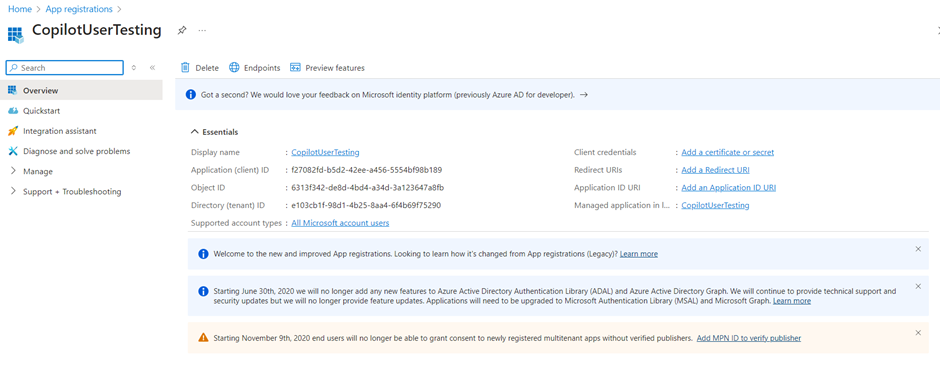
- After the registration is complete, go to Overview.
- Copy the Application (client) ID and paste it in a temporary file. You need it in later steps.
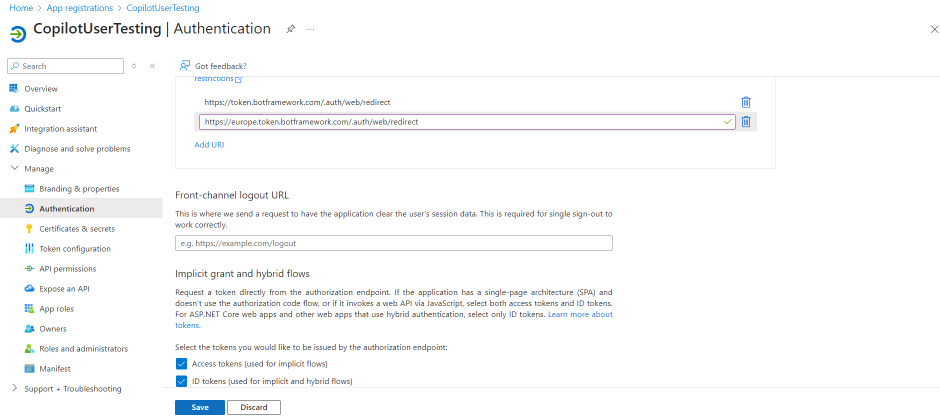
- Under Manage, select Authentication.
- Under Platform configurations, select Add a platform, and then select Web.
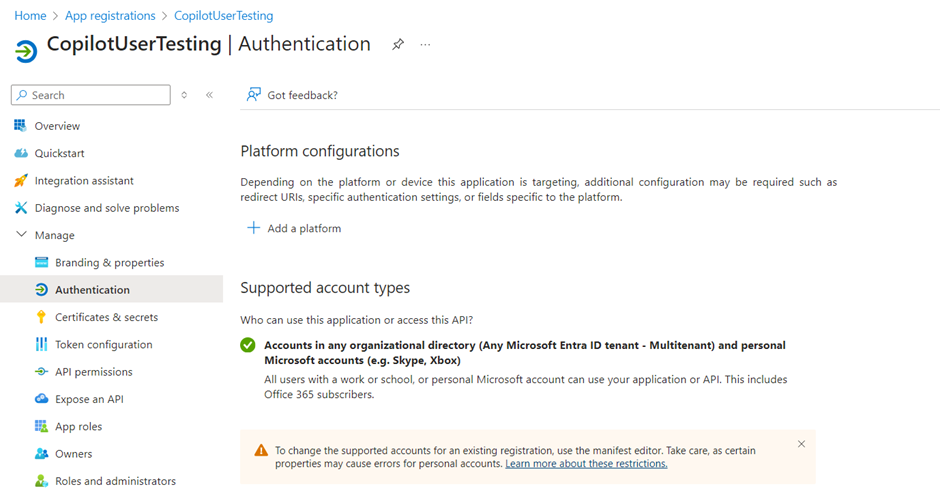
- Under Redirect URIs, enter https://token.botframework.com/.auth/web/redirect, and select Configure.

This action takes you back to the Platform configurations page.
- Under Redirect URIs for the Web platform, select Add URI.
- Enter https://europe.token.botframework.com/.auth/web/redirect, and select Save.
- In the Implicit grant and hybrid flows section, select both Access tokens (used for implicit flows) and ID tokens (used for implicit and hybrid flows).
- Select Save.
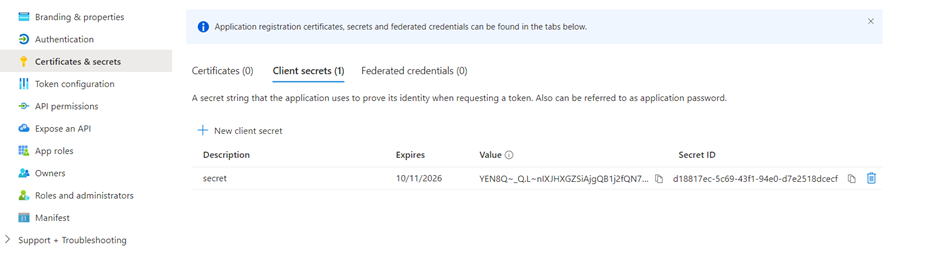
- Next step we need to create a Client Secret.
- Under Manage, select Certificates & secrets.
- In the Client secrets section, select New client secret.
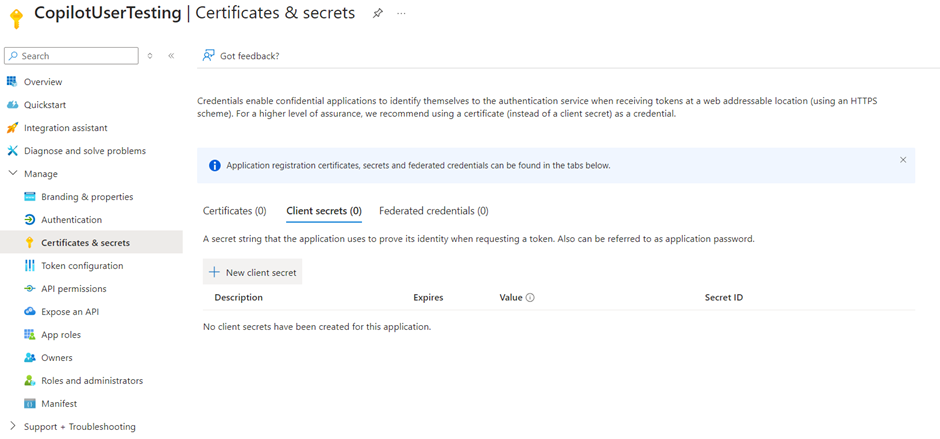
- Select the expiry period. Select the shortest period that’s relevant for the life of your copilot.
- Select Add to create the secret.
- Store the secret’s Value in a secure temporary file. You need it when you configure your copilot’s authentication later on.
- Next step is to Configure manual authentication.
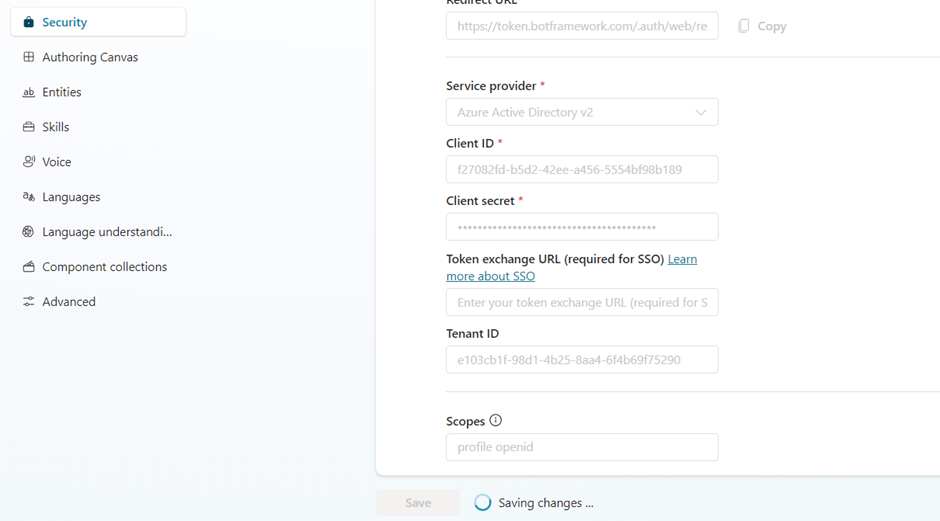
- In Copilot Studio, go to Settings for your copilot, and select Security.
- Select Authentication.
- Select Authenticate manually.
- Leave Require users to sign in on.
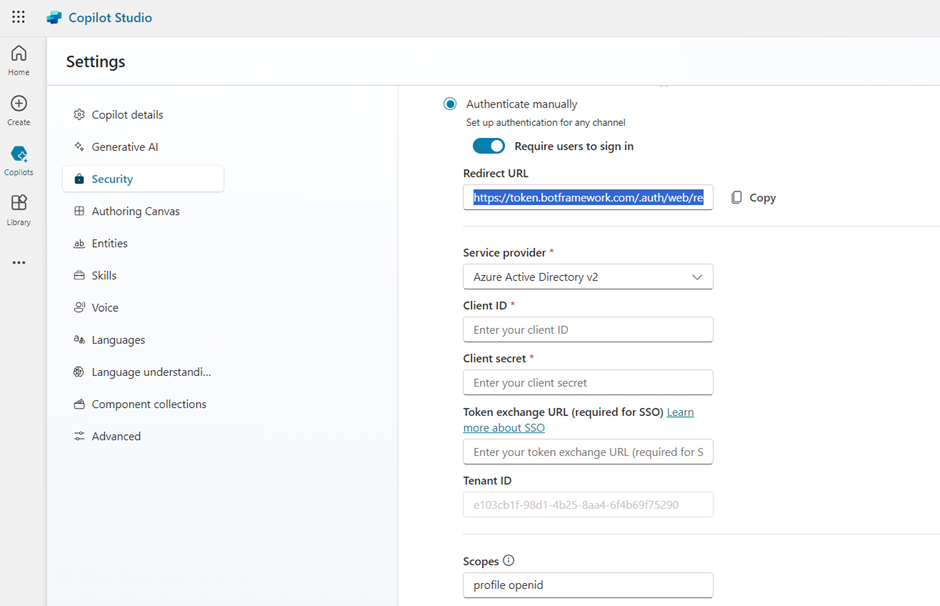
- Enter the following values for the properties:
- Service provider: Select Azure Active Directory v2.
- Client ID: Enter the application (client) ID that you copied earlier from the Azure portal.
- Client secret: Enter the client secret you generated earlier from the Azure portal.
- Scopes: Enter profile openid.
- Select Save to finish the configuration.
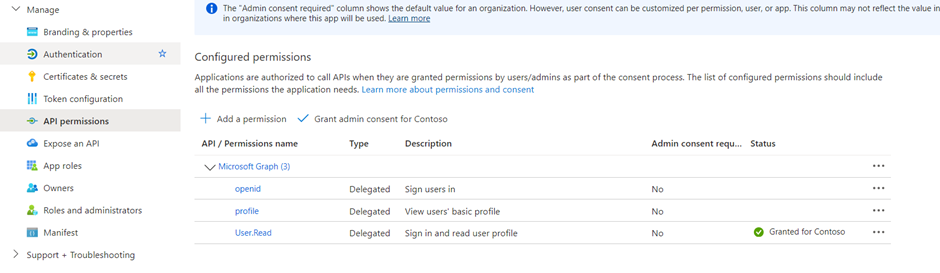
- Now again navigate to the Azure Portal to Configure API permissions.
- Go to API permissions.
- Select Grant admin consent and then select Yes. If the button isn’t available, you might need to ask a tenant administrator to do enter it for you.
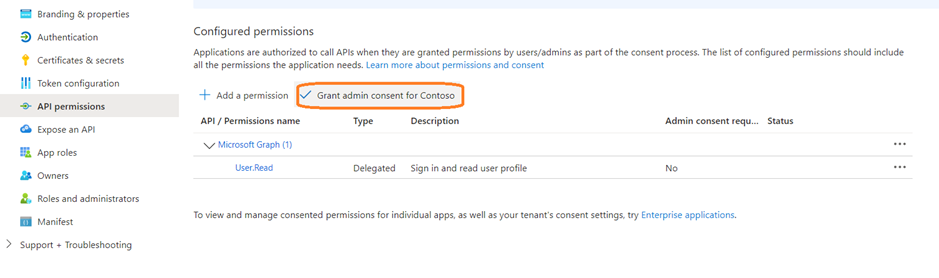
- Select Add a permission, and then select Microsoft Graph.
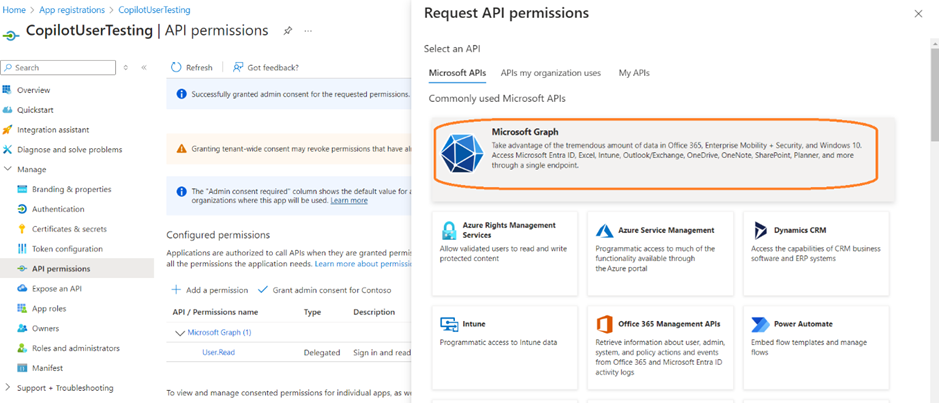
- Select Delegated permissions.
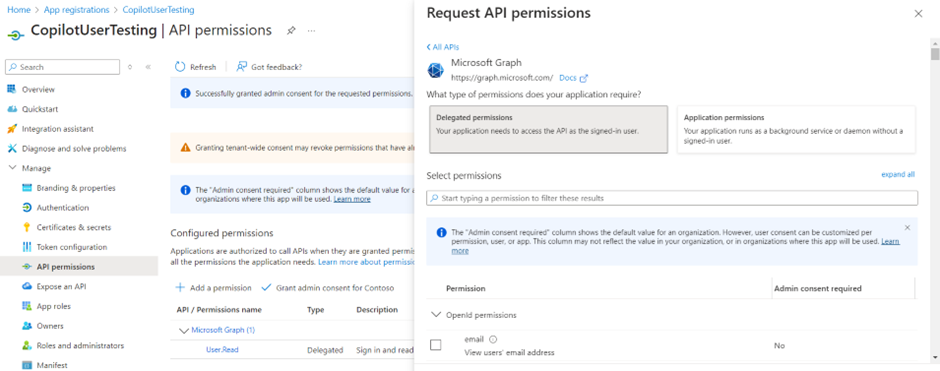
- Expand OpenId permissions and turn on openid and profile.
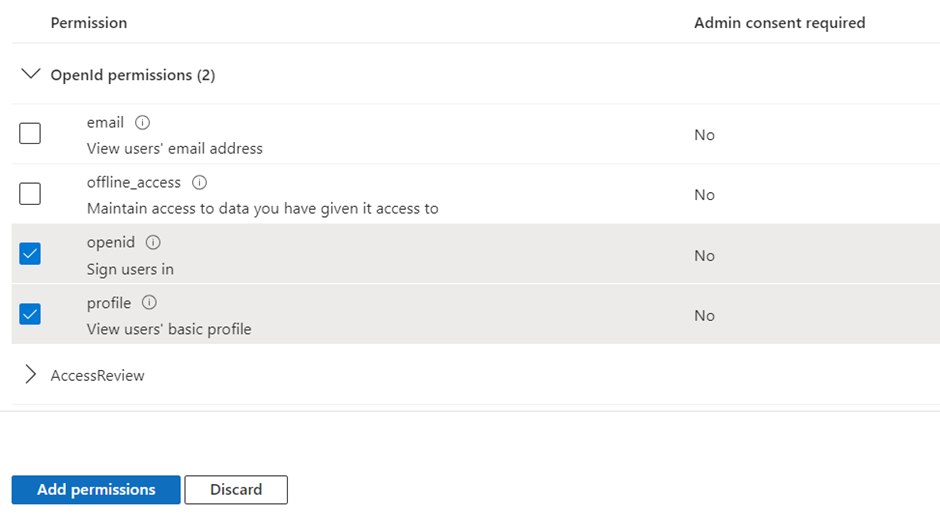
- Select Add permissions.
- Now we need to Define a custom scope for your copilot. Scopes allow you to determine user and admin roles and access rights.
- Go to Expose an API and select Add a scope.
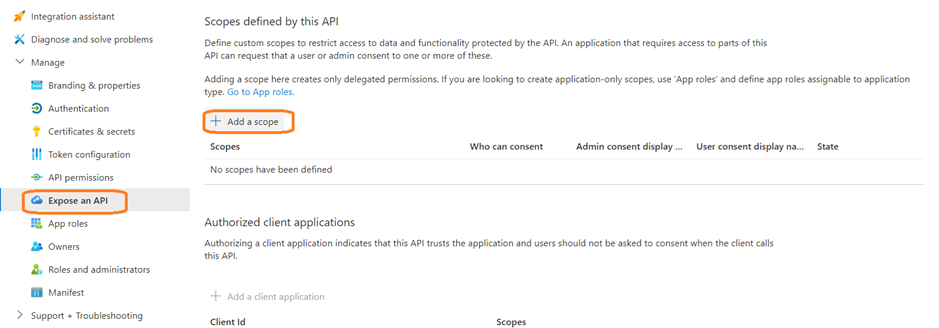
- Set the following properties. You can leave the other properties blank.
- Scope name: We input Test.Read
- Who can consent?: Select Admins and users
- Admin consent display name: Test.Read
- Admin consent description: Enter Allows the app to sign the user in.
- State: Select Enabled
- Select Add scope.

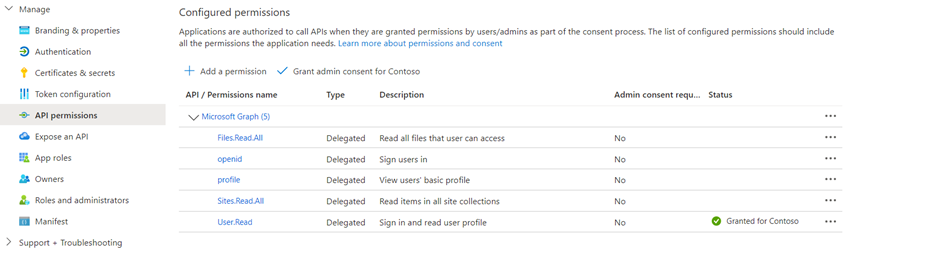
- The scopes should include profile openid and the following, depending on your use case:
- Sites.Read.All Files.Read.All for SharePoint
- ExternalItem.Read.All for Graph Connection
- https://[OrgURL]/user_impersonation for Prompt Nodes and Dataverse structured data
- For example, Dataverse Structure Data or Prompt Node should have the following scopes: profile, openid, Sites.Read.All ,Files.Read.All https://myorg123.com/user_impersonation
Now all the Setups are completed !!!
Test the Copilot:
- We can now start testing the Copilot.
- When you open the Copilot, it will straight away prompt to Login if the user is not authenticated.
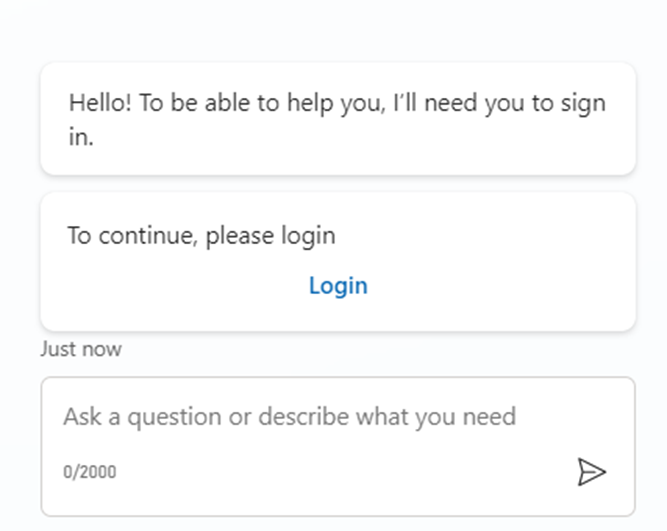
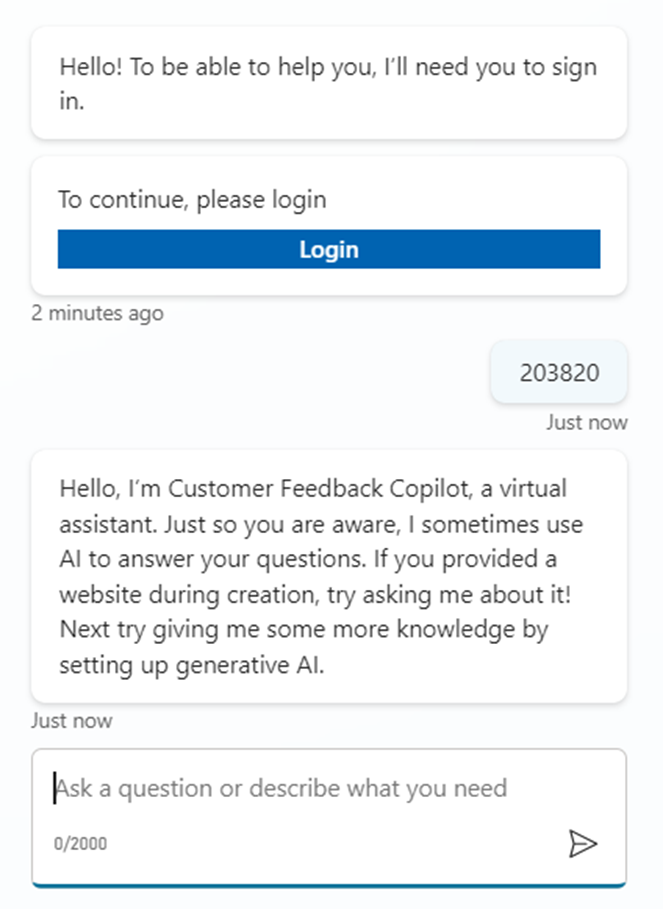
- Click on Login will open a new tab, that provides a validation code as shown below.
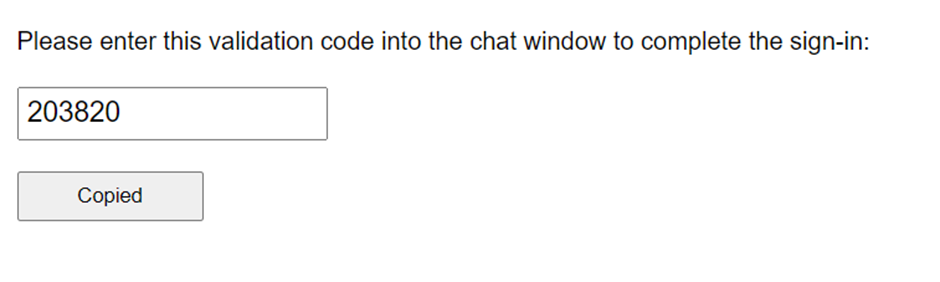
- User needs to Copy paste the code inside the Bot conversation to allow Bot to validate.
- Once the Copilot validates, then the Conversations will start as shown below.
- If the Validation code is not provided, user will not be able to go ahead with the conversation.
Happy Copiloting !!!
[…] Copilot Studio: How to Configure Manual Authentication […]
Hi Vinoth,
This is Prabhu, I have been trying to configure the agent in my sharepoint site. I followed the same steps that you have provided in this page. It is working absolutly fine for me (as a Owner) but for Users they are unable to access it. They are getting below error message if they provide the Validation Code in the Chat Window. Could you please help
Sorry, something unexpected happened. We’re looking into it. Error code: AccessToBotDenied. Conversation ID: Fd86GbZtOrfJAk0pstlEAc-us. Time (UTC): 12/10/2024 6:00:49 PM.
it is working fine after sharing the agent to the users.
I have another question – Is there any other way that we can authenticate automatically in sharepoint site without asking user to login on every visit ?
Your insights are spot-on!
I am happy for copilot and business solutions for proactive Microsoft Store is ideal because it is very big company.
Now with copilot and Premier support I have some other element who is main part of communty group Microsoft organisation